THE CABIN WEEKEND PHOTO GUIDE
Cabin Photo Ideas: Window Light and a 5-Shot List
The best cabin photos happen at the biggest window. Sit beside it, let snow and morning light do the work and expose for your face. Plus a five-shot cabin weekend list from arrival to boots and blankets.
Try the idea on your own photo with Stunna.


Free to download. Pro options available.
Cabins are made for photos: wood, wool, a mug of something hot and snow or trees outside. They can also be dark inside, with small rooms, warm lamps and a bright window that confuses the phone. The simplest fix is to find the biggest window and work beside it. This guide covers that window setup, exposing for the face and a five-shot list for the whole weekend. These are tips for your own photos; the illustrations are AI-generated examples, not actual Stunna results.
Why the biggest window is your best spot
A big window is a large, soft light source. The bigger the window compared with the person, the softer the shadows on the face. On a snowy morning, the snow outside acts like a giant reflector, bouncing light up and into the room, so even a north-facing window can feel bright and clean.
Walk through the cabin when you arrive and look at which window gets the most light in the morning and which faces the best view. A window seat, a table by the glass or an armchair you can drag over all work. Switch off overhead lights near your spot so the window is the main light; a mix of warm bulbs and cool daylight on one face rarely looks good. Our window light photo guide explains the basic setup in more detail.
Set up the window seat
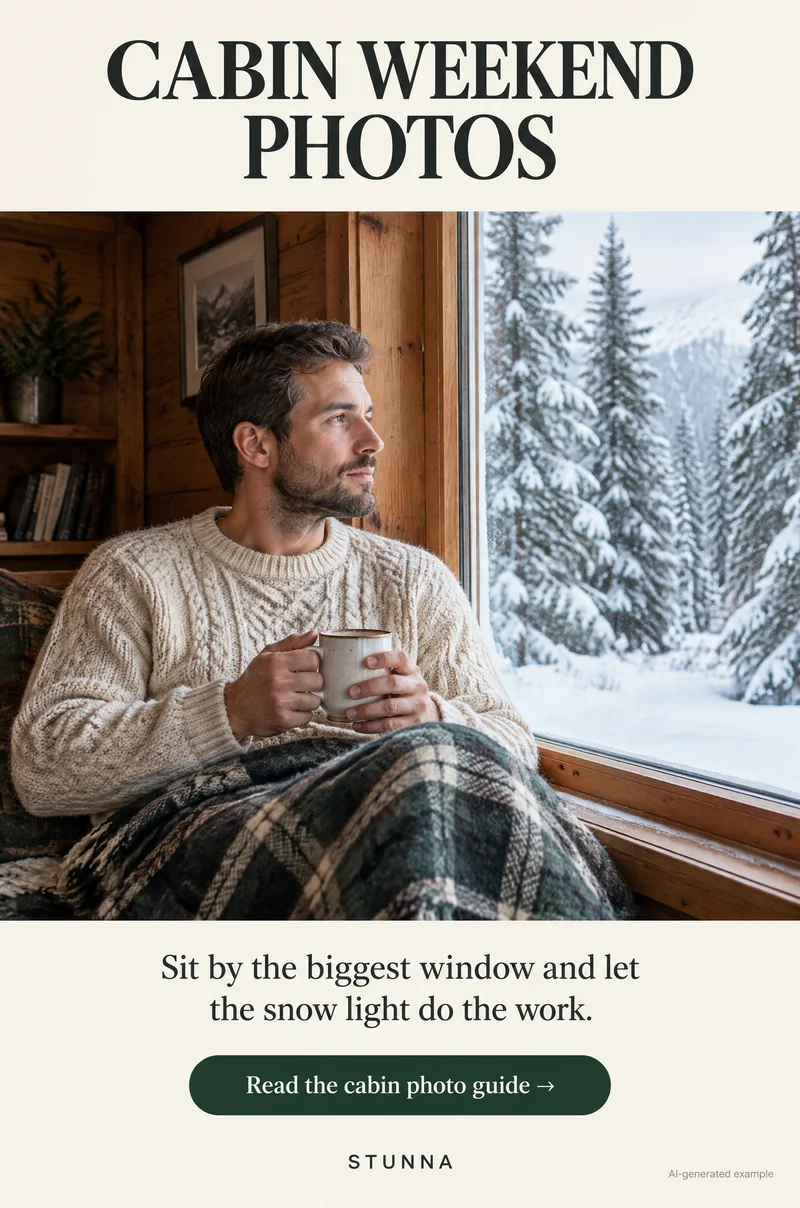
Sit beside the window rather than with your back to it. Turn your body so one shoulder is near the glass, then turn your face slightly toward the window. The light falls across the face from the side and front, with soft shadow on the far cheek. If you sit facing straight out, the photographer only sees the back of your head; with your back to the window, you become a silhouette.
Give your hands a job: a mug held in both hands, a book on your knees or a blanket pulled up. Looking out at the snow or trees gives a calm, candid frame, and a glance back toward the camera gives a second option from the same setup. The photographer should stand inside the room, slightly in front of you, at about your eye level.
Keep the frame tidy. Move bags, chargers, empty bottles and the remote out of view, and straighten the blanket so it looks used but not crumpled into a heap. A few real details, like a book or a pair of thick socks, look better than a staged pile of props.
Expose for the face, not the snow
A bright snowy window and a darker room give the phone a very wide range of light. Left alone, it may darken everything to keep the window from turning white, leaving your face dim. Tap your face on the screen to set focus and exposure there. The window may get brighter or even go white, which is fine; a clear face matters more than detail in the snow.
If you want to keep some of the view, move the person closer to the glass so their face receives more light and the gap between room and outside shrinks. You can also lower brightness slightly after tapping and check that skin still looks natural. Take a couple of versions and compare them later. The snow day photo guide covers exposure checks for portraits outside in the snow.
The 5-shot cabin weekend list
Five different moments make a better set than thirty versions of the same window. Save this list for your winter getaway.
- 01 Arrival, the cabin from the path: stop before you reach the door and photograph the cabin from the path or the driveway, with trees or snow around it. At dusk, with the lights on inside, it looks especially welcoming.
- 02 Window seat with a mug: the main portrait. Sit beside the biggest window, face turned toward the light, mug in both hands and a blanket on your knees.
- 03 Porch steps portrait: sit on the porch steps in soft morning light, coffee in hand, and let the cabin and trees fill the background. Shoot from a step or two below at eye level.
- 04 Fire or lamp at night: the evening frame. Ceiling lights off, one lamp or the fire as the main light, and a face turned toward the glow.
- 05 Boots and blankets detail: a close-up of boots by the door, wool socks by the fire or a blanket and book on the sofa. No faces needed.
Arrival and porch steps
The arrival shot sets the scene for the whole set, so take it before everyone carries bags inside and the porch fills with boxes. Stand far enough back that the whole cabin fits with some space around it, and use the main lens rather than the ultra-wide if you can, so the building does not bend at the edges. Footprints in fresh snow leading to the door add a nice line into the frame.
For the porch steps portrait, morning works well because the light is soft and low. Sit a little to one side of the steps so the door or a window shows behind you, and hold a mug to keep hands relaxed. If you are a couple, sit one step apart and lean toward each other rather than lining up side by side. Shoot a burst while you talk or laugh, and pick the frame where both faces look natural.
Cold drains phone batteries quickly. Keep the phone in an inside pocket between shots and bring a power bank if you are out for a while. Wipe the lens when you come in from the cold, because condensation can fog it for a minute or two.
Fire or lamp at night
At night, the cabin's warm light becomes the main subject. Switch off overhead lights and work with one lamp or the fireplace. Sit near the light with your face turned toward it, and keep the background dark and soft. Tap your face to set exposure, lower brightness a little so the flames or the bulb do not blow out, and hold the phone steady for the night mode capture.
Stay a safe distance from an open fire and keep blankets, sleeves and hair away from the flames and the fireplace opening. If there is no fire, a single table lamp works just as well; our lamp light portrait guide shows how close to put it. A few candles on the table can add sparkle, as long as you never leave them burning in an empty room.
Warm inside, cool outside: handling mixed color
Cabins often mix warm bulbs and cool blue daylight from snowy windows. Your phone picks a balance, and depending on the scene the room can look orange or the snow can look blue. During the day, switch off warm lamps near your spot so the window light stays clean. At blue hour and night, lean into the warmth and let the windows go deep blue behind you; that contrast is part of the cozy look.
In the edit, decide which light matters most. For a daytime window portrait, keep skin natural and snow close to white. For a night frame by the fire, keep some warmth and just pull the temperature back slightly if skin turns too orange. Avoid pushing saturation, which makes wood paneling look like plastic.
Boots, blankets and the small details
Detail shots fill the gaps between portraits and make a weekend photo dump feel real. Look for texture: knit blankets, wood grain, a stack of logs, snow on boots by the door, a mug ring on the table or frost on the window. Shoot close, from above or at a low angle, in window light during the day.
Hands work well here too: hands around a mug, pulling on boots or lacing them by the door. Keep the frame simple with one or two objects rather than a crowded flat lay. If you post the set, our weekend photo dump guide has an easy order for mixing portraits and details.
Common mistakes
Cabin photos usually go wrong in a few predictable ways. Check these before and after you shoot.
- Back to the window: you become a silhouette. Sit beside it and turn your face toward the light.
- Overhead lights on during the day: warm bulbs mixed with cool daylight give patchy, orange skin.
- Ultra-wide lens in small rooms: walls bend and faces at the edge stretch. Step back and use the main lens.
- Clutter in the frame: bags, cables and grocery bags pull attention. Clear one corner and shoot there.
- Over-warm edits: heavy orange makes wood and skin look the same color. Keep a little contrast between them.
- Rental details: avoid posting the address, door codes or anything that identifies the property if your host would not want it shared.
A few useful answers
Where should I sit for cabin photos?+
Beside the biggest window, with one shoulder near the glass and your face turned slightly toward the light. Snow and morning light bounce in softly and flatter the face.
Why does my face look dark in front of a snowy window?+
The bright window makes the phone darken the whole frame. Tap your face to set exposure, move closer to the glass and accept that the snow outside may turn bright white.
What photos should I take on a cabin weekend?+
A simple five-shot list works well: the cabin from the path on arrival, a window seat with a mug, a porch steps portrait, the fire or a lamp at night and a boots-and-blankets detail.
How do I take cozy cabin photos at night?+
Switch off the ceiling lights and use one lamp or the fire as the main light. Turn your face toward it, tap to expose for the face and hold the phone steady.
Should I use the ultra-wide lens inside a cabin?+
Use it sparingly. In small rooms it bends walls and stretches faces at the edges. The main lens with a step back usually looks more natural.