THE RAINY NIGHT PHOTO GUIDE
Rainy Night Photography with a Phone: Tips
Use reflections, a readable face, and restrained color to give an evening street photo depth.
Try the idea on your own photo with Stunna.


Free to download. Pro options available.
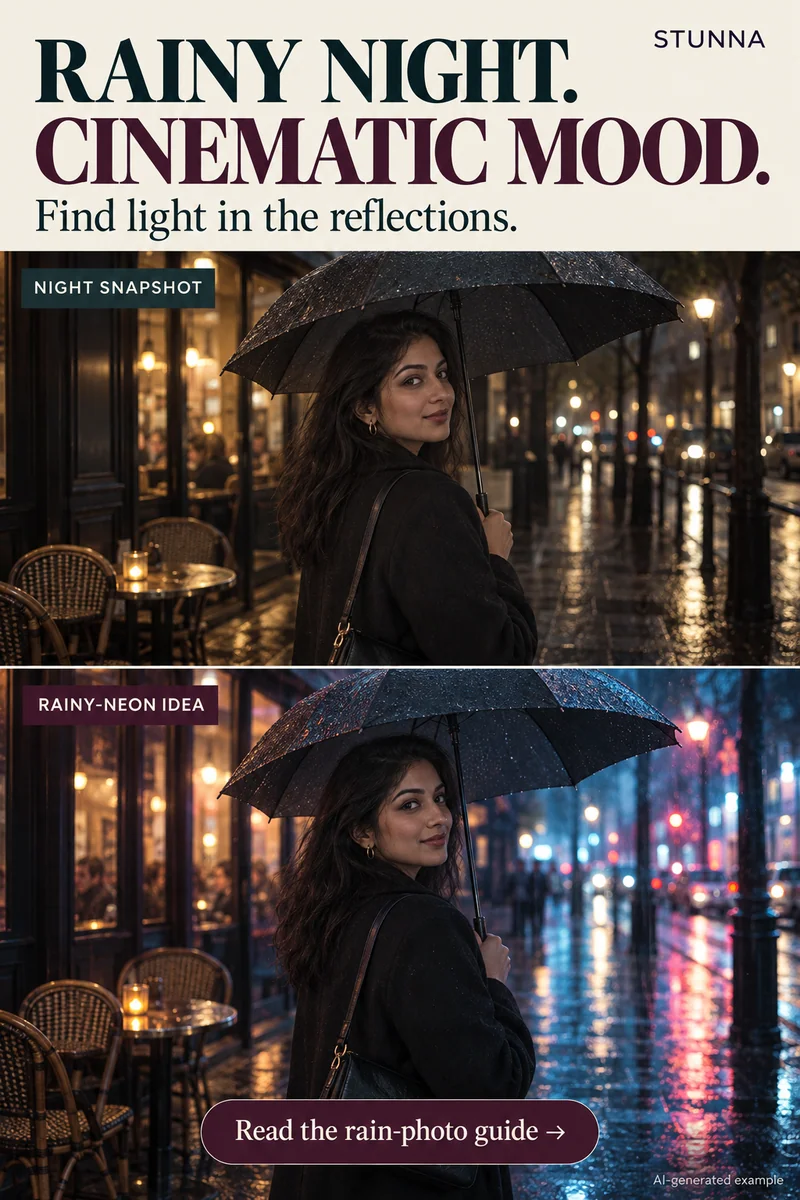
A rainy-night photograph has three useful ingredients: a light source, a surface that catches it, and a subject you can still read. You do not need every street to glow. One reflected sign or pool of warm light can carry the picture, and going out a little earlier for blue hour photography adds dusk sky to the same streets. This guide covers finding that frame and choosing an edit afterward. The before-and-after campaign image is an illustrative AI concept, not an actual Stunna output or a record of the weather.
Find one reflection and build around it
Look for reflected light from a covered doorway or cafe window. Move the phone higher and lower to see how the reflection changes. A lower angle can include more foreground color; keep some street or storefront in frame to explain it.
Choose one main light source. Put the subject beside the reflection rather than blocking it. Keep the phone protected under cover or suitable rain protection, and wipe lens droplets before judging sharpness. Follow your device's guidance for wet conditions.
Keep the person visible in the existing light
Bring the subject near a window or lit entrance and turn their face toward that source. Check that both eyes are readable and the light does not create an awkward line across the face. Make one still frame before asking for movement. In low light, a small change in position can matter more than a dramatic pose. Warm decorations work in a similar way; see our guide to string light portraits.
Start with the main camera, tap the subject to focus when supported, and steady the phone. If night mode asks you to hold still, let the capture finish. Compare that image with a normal frame or a flash test.
Capture a four-photo evening sequence
Keep the strongest light source as the thread connecting your set. Change distance and subject rather than changing the color treatment each time. If the signs clash, converting the whole set with a black and white filter is another consistent option.
- The wide scene: include the light, pavement, and some dark space so the reflection has context.
- The portrait: stand near the light and frame the face clearly, with a hint of reflected color behind or beside the subject.
- The detail: photograph rain on a window, a sleeve, or a reflection with a clean shape. Avoid filling the image with unrelated signs.
- The movement: capture a small turn or walking moment, then pause for a sharper version of the same composition.
Edit color without losing the night
Start by checking face brightness and the brightest signs. Raising every shadow can flatten the scene and make noise more obvious. Keep some dark areas, reduce extreme color casts in skin if needed, and let reflected color remain strongest on the surfaces where you actually saw it. If you want a red cast as a deliberate style, our free red light filter applies one on your device.
Add contrast and saturation in small steps. Check at full size for halos around hair, smeared details, and patches of color that do not follow the light. A cool shadow and warm window can coexist; the whole image does not have to become blue or magenta to feel cinematic, and our black and white portrait photography guide covers a monochrome route instead. If you add grain to the photo, keep it light so it does not exaggerate existing low-light noise.
Match the Stunna look to your intention
Rainy Neon is Stunna's creative direction for cool rain, wet reflections, and neon lighting. Blue Hour aims for dusk sky and ambient city glow. Choose Rainy Neon when that stylized wet-street interpretation fits your picture, and Blue Hour when you want a dusk mood with less emphasis on rain. For a free on-device finish instead, our G7X filter app gives a direct-flash look and the VHS filter adds a retro video texture.
Generated relighting may change weather and scene details. Compare face and clothing with the original, then check light direction and reflected signs. Keep the original as the accurate record and save a creative interpretation separately.
A few useful answers
Does the street need lots of neon signs?+
No. One window, lamp, or illuminated sign can provide the light and reflection. A simpler scene often gives the portrait a clearer focal point.
Why is my rainy-night portrait blurry?+
Low light can require a longer capture. Steady the phone, keep the subject still for one frame, and move closer to an existing light before trying again.
Can I try Rainy Neon on a dry photo?+
You can explore the creative look, but it may reinterpret weather and surfaces. Treat that version as a generated scene rather than a documentary record of actual rain.