THE BLACK-AND-WHITE PHOTO GUIDE
Black and White Portrait Photography: How to Make It Stronger
Find light and shape first, then choose a monochrome finish that keeps the face readable and the scene intentional.
Try the idea on your own photo with Stunna.


Free to download. Pro options available.
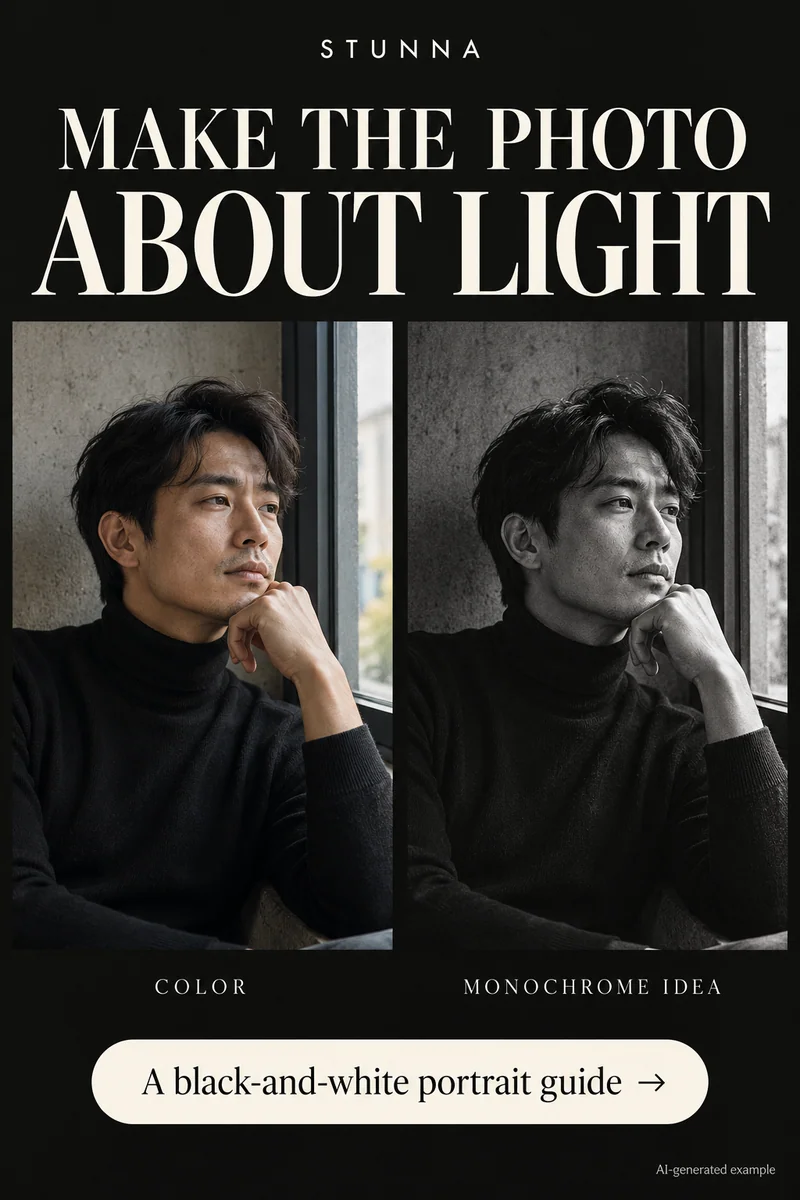
Black and white changes what the eye follows. Color stops carrying the image, so light, expression, texture, and shape become more important. A good conversion starts with a photograph that has something clear to say in those terms. The campaign comparison is an illustrative AI concept, not an actual Stunna result. Use this guide to choose a source, make a restrained manual edit, or explore a more stylized monochrome mood.
Choose a picture with clear tonal separation
Look for a face that stands apart from the background in brightness. A red jacket against a green wall can become similar in gray. Preview in monochrome first; choose another frame or angle if the subject blends into the setting.
Texture gives the eye something to follow: linen, wet pavement, or hair catching light. Keep one main texture and a clear subject. Removing color does not automatically simplify a busy picture.
Use light to describe the face
For a softer portrait, stand near a window or open shade and turn until the light reaches one side of the face. Take a still picture and check whether the eyes have detail. Keep the pose comfortable; you are looking for readable shape rather than the deepest possible shadow. Our window light photography guide covers more indoor positions.
For a direct-flash mood, put space behind the subject and test the rear-camera flash. A brighter face against a dimmer scene gives a different kind of separation. Review forehead, cheeks, and pale clothing for bright areas without texture, then change distance or exposure where supported before shooting again.
Convert in this order
Use your editor's monochrome preview and work from the subject outward. Make small adjustments and return to the original occasionally so you notice when the finish becomes too strong.
- Set the face brightness. Keep the expression and eyes visible before adjusting the whole scene.
- Protect bright detail. Ease highlights if the source contains recoverable texture in skin, sleeves, or windows.
- Add depth gradually. Darken shadows until the subject separates, while keeping important hair and clothing details readable.
- Adjust local tones if your editor supports it. Use the color mixer gently to separate nearby gray areas rather than pushing every channel to an extreme.
- Add grain last, if desired, in your editor or with a free tool to add grain to a photo. Compare at the size you plan to share and inspect the face at full size before exporting.
Try three compositions before changing the finish
Start with a close portrait that gives the expression room. Make a second frame wider, including a doorway, wall, or street line. For the third, photograph a detail such as hands, fabric, or a reflection. Shared light and compatible contrast connect the set without making every photo identical. Overcast light suits this well; see our guide to cloudy day photography.
Watch bright objects near the edges. A white sign or window can pull attention away from a face even after all color is removed. Move the camera or crop deliberately. Keep enough room around fingers and joints so the crop feels chosen rather than accidental.
Choose B&W Flash or Noir by the mood
Stunna's B&W Flash combines a monochrome direct-flash direction with deep blacks and fine grain. Noir is a high-contrast black-and-white direction with deep shadows. B&W Flash suits a crisp night-out interpretation; Noir gives a more dramatic tonal starting point. Neither name guarantees that every source photo will suit the look.
These generated looks can change more than color. Inspect face identity, fingers, clothing, and background geometry alongside the light. If you only want to remove color while preserving every captured detail, a conventional monochrome editor, such as our free black and white filter, gives you a more direct workflow. Keep the original and save the chosen interpretation separately.
A few useful answers
Will black and white rescue a badly exposed photo?+
It may make color distractions less obvious, but it cannot reliably recreate detail missing from a washed-out face or an unfocused original. Choose the strongest source first.
How much contrast should I add?+
Stop when the subject reads clearly and important texture is still visible. Check the face, dark hair, and clothing instead of judging only the overall drama.
Do I need grain for a monochrome photo?+
No. Grain is a stylistic choice. Try a clean version first, then compare a restrained grain finish at the size you will share.