THE LIGHTING GUIDE
Golden Hour Photography: Better Sunset Portraits
Find warmer light, avoid the silhouette trap, and edit a sunset portrait while keeping natural skin tones.
Try the idea on your own photo with Stunna.


Free to download. Pro options available.
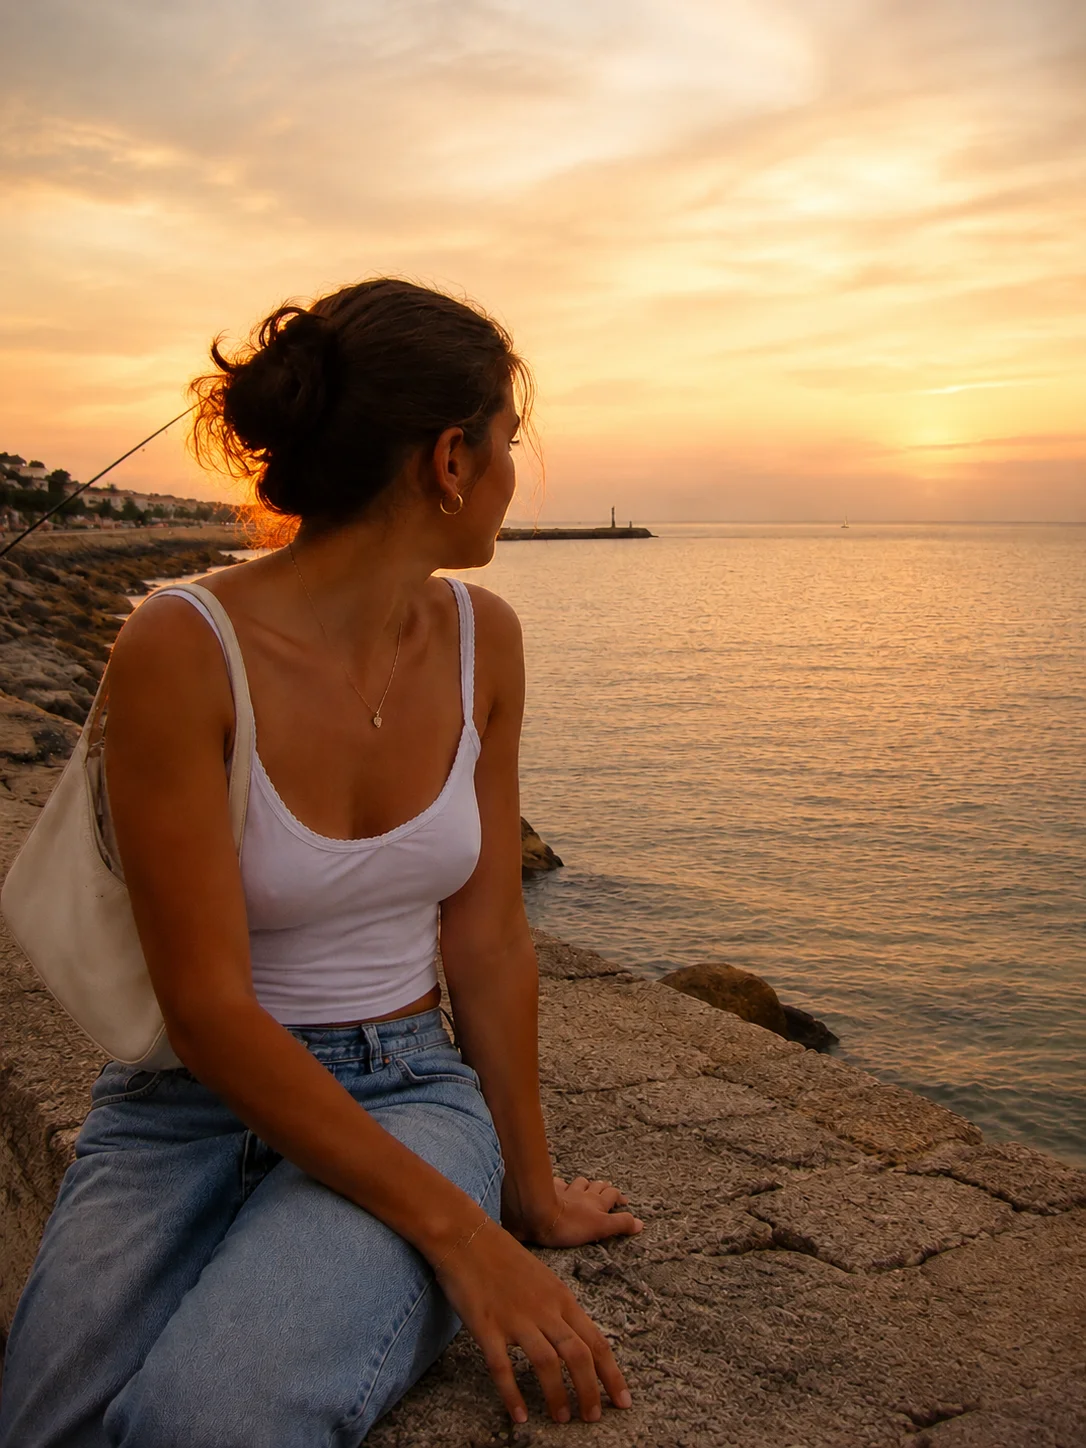
Golden-hour portraits work because low sunlight can give a photograph warmth, direction, and softer-looking light. The useful window depends on your location, the season, weather, and buildings around you. Arrive early enough to experiment, rather than expecting the same sixty-minute recipe everywhere. The steps below help you find flattering light and keep the person as important as the sky. AI-generated visual examples illustrate the look; they are not measured Stunna outputs.
Find a place where the light can reach you
A sunset time tells you when the sun reaches the horizon; it does not tell you when it disappears behind a building. Look for an open side of a park, a wide street, or a spot beside the water. Walk around and watch where the shadows fall. If the light has already left your chosen spot, move toward an open area instead of forcing the same composition. If clouds cover the sun or you are stuck shooting at midday, see our guides to cloudy day photography and photos in harsh sunlight.
Bring a simple plan: one portrait, one wider photo, and one detail. You can get a complete set without constantly changing locations. Shooting alone? See our tips for taking pictures of yourself. Wipe the phone lens before shooting, especially if bright sunlight is making the image look unexpectedly hazy.
Follow this six-step portrait setup
Start with light from the side. It is easier to see what it is doing to the face, then you can try backlighting once you have a frame you like.
- Turn slowly until the sunlight touches one side of the face. Let the subject look near the photographer rather than directly into the sun.
- Choose a calm background and keep the horizon away from the neck. Take a step sideways if a tree or pole appears to grow out of the head.
- Use the main camera, step back for the composition, and tap the face to focus where supported. Start with a test frame rather than a preset exposure number.
- Check both the face and the brightest part of the sky. If the person becomes a silhouette, change the angle or move toward light reflected from a pale wall.
- Try the sun just behind one shoulder for a rim of light around the hair. Shift the phone slightly if flare washes across the eyes.
- Capture a still pose, a small turn, and a wider version. Review them while you still have light, then repeat the strongest setup.
Build a three-photo set instead of ten identical sunsets
Your portrait is the anchor. Make the second image wider so it includes the place: the path, terrace, or coastline. For the third, move closer to a small detail such as a sleeve catching the light, a drink, or shadows on the ground. The variety makes a photo dump feel considered even when all three pictures share the same warm light. For a longer trip, our travel photo dump ideas build on the same mix, and in autumn our fall photoshoot ideas pair well with low sun.
Keep a comfortable pace. When the light changes, photograph what is working now rather than chasing a previous shot. After the sun disappears, the scene may suit a softer dusk mood. That can be a good photograph too; our guide to blue hour photography covers that window.
Edit warmth without turning everything orange
In a manual editor, correct exposure before adding warmth. Adjust white balance in small steps and use something familiar in the image, such as a white shirt or a neutral wall, as a reference. Skin should still have its own range of tones. If faces, clouds, and white objects all become the same orange, ease the temperature or saturation back. For a film-style grade, see our warm film look guide, or try the free vintage filter in your browser.
Keep some detail in highlights and some depth in shadows. A warm grade can complement existing light, but it does not automatically create convincing new direction. For an AI relight, check whether the highlights and shadows make sense together. Compare both versions at the same crop and inspect hair, glasses, and background edges before saving.
Match the Stunna look to the photograph
Golden Hour is Stunna’s warm low-sun look, with glowing skin and rim light. Peach Afterglow aims for a softer peach horizon and lavender sky. Soft Morning gives you a calmer, paler lighting direction. Choose one mood for the photograph; stacking every warm look can make it harder to judge what improved. These are creative edits, so review the generated result rather than expecting the exact lighting of a real sunset.
A few useful answers
Is golden hour always exactly one hour long?+
No. The practical window varies with season, latitude, weather, and obstacles that block the sun. Use local sunrise or sunset as a planning reference, then check the actual light at your spot.
Why is my face dark when the sunset looks good?+
The bright sky and darker face may exceed what the camera can capture together. Turn toward the light, find reflected light, or change the framing. Check the face after each test instead of judging only the sky.
Can I try the look on an overcast picture?+
Stunna’s Golden Hour is designed to reinterpret overcast lighting with a warm low-sun mood. It is a generated creative edit, and the outcome depends on the source photo. Inspect identity, texture, and light direction before saving.